Angels...? We're Reading the Bible Today: Joshua 5

Reading the Bible in 1 Year: The Death of Moses

Generosity and Divorce are themes as we Read the Bible this year

Reading the Bible in 1 Year: History of the Children of Israel

The Nation of Israel - Reading the Bible in 1 Year

Showing posts with label #Homemade. Show all posts

Wednesday, October 10, 2018

Quilting and Homemade Stuffed Animals

Those of you who know me, know I love to make, bake and create. I just can't seem to help it. "Sew" when I saw this little elephant fabric, I thought, "I'd love to make a little stuffed elephant for a friend's baby shower." Of course, I'd never made a stuffed animal before but again I thought, "How hard can it be?" 

Lucky for me, I was thinking in 2D not 3D. If I'd had to make four legs, that would have thrown my making into another dimension entirely...thus, 3D not 2D.

But, if you're like me and have never made a stuffed animal (without a pattern) and you're curious how I did it, just keep reading.

First, I was inspired by this fabric, which I used to make the backside of a baby blanket for my friend's shower.

But like everything I do, inspiration comes from many sources. Do you see the yellow and gray polka dot ear on the front side of the baby blanket? Well, immediately I thought an all gray elephant just wouldn't do. Imagine that. But I was also inspired by Mike Curato's Little Elliot - Big City books.

 I just heard Mike Curato give a presentation in L.A. at the SCBWI Summer Conference. I thought, "I want my little elephant to be all polka dotted--like little Eliott." So I went in search of some more fabric - this time polka dotted. And I figured I only needed about one-fourth a yard for a stuffed animal. 

Then I thought, "I really like the shape of the little gray elephant above." So I drew the shape on a piece of paper (and I'm not an illustrator or an artist) so I drew it lightly, in case I made mistakes (which is super silly because it was paper and I was using a pencil--duh, I could have erased a mistake-but whatever, that's what I did). 

When I got that done, I drew the shape right on the fabric.


Cut it out and laid the front sides together and sewed around the edges. I left a little section open so I could stuff it (I made a mistake here--I left the trunk open to stuff, I should have left a foot open to stuff so it wouldn't be noticed as much--but that's the way I did it.)

After I had him stuffed, I sewed a couple of yellow ears on (because I had some leftover yellow fabric from when I made my Candy Corn Cushions for my benches out in my yard). Then I took some leftover material and braided a tail and sewed those on. But I still needed an eye. I didn't want to sew something on that the baby might pull off and eat so I embroidered a little eyelash around one of the polka dots (on both sides). And Voila...or, as I would say,  Wah-lah!


I had a fun little gift for the baby shower (a baby blanket and a stuffed elephant). 

Let me know if you have made a stuffed animal for a child. I'd love to visit your blog to check it out.
 

Thursday, September 6, 2018

HALLOWEEN CANDY CORN CUSHIONS - a DIY Project

HAPPY FALL Y'ALL!

AND FALL MEANS DECORATING FOR THE SEASONS


It's no secret, I love to decorate for every season, holiday and/or event and I wanted to share my latest homemade "make" with you. My latest sewing adventure was to make some new cushion covers for our benches out in the front yard. I had a vision in my head of candy corn and "sew" I went to work to create my vision. And this is what I came up with: an assortment of Halloween Candy Corn Cushion covers and pillows. 
But on top of  loving to decorate, I also love to save money. So I went to Joann Fabric and Craft Store during the Labor Day Sale and bought some orange and white striped fabric and some yellow fabric. I simply had to piece the fabrics together to make my little candy corn pillow. I sewed the fabric with the right sides together (which just means the sides you want showing have to be laid face-to-face).

Then to make this square into a pillow, I cut it into a triangle and sewed it up the sides. I stuffed the triangle with fluffy batting material and then hand-stitched the edge of one corner.


After I had the pillow put together, I went to work on the cushion covers. I needed to fit the material right to the foam cushions because I didn't have a pattern. It was easy to do. All I did was simply drape the fabric over the cushion to get the proper measurements for cutting the fabric. I left an extra inch around the edges (as my seam allowance). You really only need a quarter inch for a seam allowance, but I always prefer to have a little extra (just in case). I used my pressure foot on my sewing machine as the guide to keep the lines straight as I sewed. And it was really easy.


I also wanted to be able to use the cushion covers for more than one month so on the backside I used a solid orange color, which I think is more versatile. That way, I can simply switch out the pillows and use this solid orange colored side all the way through the Thanksgiving holiday. All I have to do is have an assortment of pillowcases for every season and/or holiday...So, I'd better get back to my sewing!


Anyway, my decorating has only just begun ;D But I wanted to wish you all a Happy Fall!

And if you are making any homemade decorations for the upcoming holidays, please let me know about them so I can visit your blog and/or website. I love to get inspiration from other crafty people.

Tuesday, April 3, 2018

PENGUIN POPS


If you want to make these fun Penguin Pops, just follow the EZ steps below. 

Of course you need penguin pop molds, which you can get at candy making supply shops like Blake's Decorette Shop in Portland, Oregon

Then you need some white chocolate and some food coloring: Orange and black will do. You also need a food quality paintbrush...or two. All you do is paint the food coloring onto the mold.

Then spoon in your melted white chocolate.
Put your molds in the refrigerator to chill for a couple hours and voilÃ.

Penguin Pops


.


Saturday, March 24, 2018

Easter is Almost Here - Homemade Treats

Easter is just around the corner and it's so easy to decorate on a budget. 

All you need is a silicon mold and some chocolate. I use white chocolate to create Easter Eggs you can eat...even the shell. All you need to do is melt your chocolate and pour it into the molds. Then I put the molds into the refrigerator and let the chocolate  harden. Super simple and oh...so...pretty.
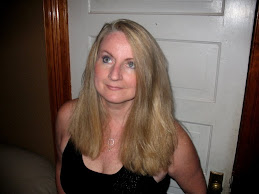

Another thing you can do is make Easter baskets...with cupcakes.


This is another super simple way to make a fun party food and create a fantastic eye-candy at the same time. All you need is regular cupcake papers and pipe cleaners. I mix shredded coconut into the frosting to create my grass for my "Easter baskets" then I top the baskets with jelly beans. Really cute and  very tasty too.

Another fun thing to do is to take plastic Easter Eggs and stuff them into little yarn chickens. I  think these little chicks are so fun.