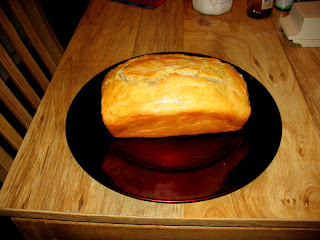
Home baked bread is the easiest thing to make. No. Really.
All it takes is a little time. I know, that’s something none of us have but if
you use an early morning, one weekend, you’ll never regret it.
This bread will have no additives, no chemicals,
preservatives or high-fructose corn syrup. All great to go without. And your
family will thank you for it. Maybe not today, but one day.
I only want healthy food around my house. You know organic, locally grown, Omega 3 type food and I absolutely love
Dave's Killer Bread (which if you can't bake is a great option) but at
four loaves for $32.00, which includes shipping, I'm thinking I can save a little money by baking a few loaves on the weekend.
Baking over the years, I’ve learned a couple of tips and tricks and
I’m going to share them so “Shoosh” don’t tell anyone my secrets.
TRICK #1: Tweak to your own taste
Most bakers stick strictly to their recipes . . . NOT I,
like the little red hen. I have to tweak and twist everything a little. I’m
always hoping to perfect my pastries and sometimes. . .I get really close. So
tweak your recipes to your own taste.
TRICK #2: Factor in the temperature of the house.
Temperature makes a big difference. No. Not the temperature
of the oven. The temperature of your house makes a HUGE difference.
I can use the same recipe in the winter as I do in the
summer, but it has to be tweaked. In cold weather I don’t need to use as much
flour. But in the summer, I need to add an additional ¼ to ½ cup…depending.
TRICK #3: Cover your dough while it bakes.
Cover your bread dough with aluminum foil so it won’t burn
on the top as it cooks in the middle. No one wants doughy bread or burnt
bread…well, to be honest I like the edges of my bread burnt (a little). I love
crispy, crunchy textures. Not my family though. So, if your family is like
mine, cover with foil while the bread cooks.
So I pull out my rolling pin, flour and a casserole dish with a lid so I can cover my bread dough while it rises - but you can use foil just as easily or plastic wrap, or even a warm wet towel.
Anyway, here’s the recipe for this super-simple EZ bake
bread.
3 ½ cups flour
2 cups warm water
2 tablespoons (melted) butter (salted-that way you don’t
have to buy unsalted butter-and who keeps that on hand, and you don’t have to
measure out a tablespoon of salt-EZ tip)
1 package of active dry yeast
Take the warm water and add the active yeast. Let it sit
while you melt your butter in the microwave. Then pour the yeast-water and
melted butter into a bowl and mix, slowly adding in the flour until you have a
ball of dough. Then take your ball of dough and put it in a pre-greased bowl
and cover for ½ hour to let rise.
TRICK #4: Let dough rise in heat.
Set your dough bowl on top of the oven while it
preheats, the warmth will help your dough rise and make it so much fluffier.
Then knead your dough a bit, right in the bowl, recover and
let rise again for another ½ hour.
Then take a bread pan or two and grease them with oil and
flour or a non-stick spray. Put your dough in the pan and bake at 400 degrees
and bake for 20-25 minutes, then pull off your foil and drizzle with a couple
tablespoons of melted butter mixed with 1 tablespoon of melted honey. Reduce
heat to 350 and bake for an additional 20-25 minutes or until golden brown. I like to pour honey into the cracks when I pull it out of the oven for a little added sweetness.
Another Tip is to bake in a cooking stone if you have one. It will make sure the temperature is even all the way around. Here's mine, it doesn't look pretty but the food comes out almost perfect every time.
Tip 2: Never Bake Just One Loaf.
I also have a glass bread pan that I use because you can never have too many loaves of bread and baking stones are expensive.
But as you can see, it isn't as pretty when it pops out as the bread from the cooking stone.
Tip #3: This tip is to flip.
I always like to flip my bread over just to make sure the bottom is done the way I want it.
Then I flip it back over and put it on a pretty plate.
Wah-lah!
EAT while warm – it is sooooo delish!


