Reading the Bible in 1 Year

The Nation of Israel - Reading the Bible in 1 Year

Showing posts with label #sewing. Show all posts

Saturday, December 2, 2023

Vlogmas Day #2 - Join me as I Craft for Christmas


 I'm making, baking and creating for Christmas. Join me for Vlogmas Day 2 and see what I'm making to celebrate the season. Just click this link and see my 2 crafts for Day 2 of Vlogmas.

https://rumble.com/v3zasew-vlogmas-day-2-crafting-for-christmas.html

Monday, July 4, 2022

It's Christmas in July - Quilting

It's Time to Get into Gear for Christmas


It's Christmas in July and time to start crafting, making and baking, if you want to be ready when the holidays roll around. So, here's a little homemade holiday inspiration to help get you going. 


Friday, July 30, 2021

Ghost Stuffing - DIY Halloween Decorations

YIKES!


Do you love the Holidays? Well, if you're like me, and  you love every holiday that happens to come around, then you decorate for all of them. 

And one of my favorite holidays to decorate and celebrate is Halloween. So, I start early.

I mean who doesn't love dressing up and getting free goodies? 

Plus, I have so much fun seeing the kids' faces when they come around, that I look forward to the entire season. 

But, the one thing I don't like is spending money. So, I make most off my decorations myself (or with a little help from my kids and husband). 

If you are interested in seeing how I made this little ghost and gave him his 3-D stuffing, simply click on the video below or visit my YouTube Channel - just search for Kim Kasch, and I should come up. I mean how many Kim Kasch's can there be?

And, if you make a little ghost like this, then please share in the comment section below because I'd love to see what you came up with.

Sunday, May 2, 2021

Flosstube Episode 7 - A Short Update of Progress, Plans and the Blackbir...


My sister and I have been trying to do things  we used  to love to do when we were young. One  of those things is cross-stitching. Sew ;D we're working on projects we can do together - even if we're apart. And one of those projects is a Halloween decoration. And, if you've seen any of my blogs around the Fall, you know I love to decorate my yard for the kids. And this cross-stitch project might give you a clue about this  year's plans for decorating my yard. 

I'm also taking part in a cross-stitch SAL (which is a Stitch Along) and I'm hoping the SAL will help me make some progress on my Blackbird Design-Spell of the Moon (which just happens to be another Fall Themed pattern). 

Plus, there's a little bit about a fiber art stop at Jorsted Creek in Olympia. 


Take a peek below at the short clip, if you're interested in crafting, stitching, knitting and more. 

Plus, Happy May!

Saturday, March 13, 2021

Flosstube - St. Paddy's Day shirt and WIPS


My sister and I are taking up an old habit...of cross-stitching. And, we thought it would be fun to connect with our creative community out there. If you're interested in making a few future friends and joining us on our crafting journey, take a peek at our video below. Or hop over to my YouTube and Check out my entire Flosstube page. 

But no matter what you decide to do, I want to wish you a Bit 'O Luck this next week as St. Paddy's Day approaches!

Monday, January 11, 2021

DIY Valentine's Day Decorations to spread a little LOVE around

If you're interested in spreading a little love around your house, with inexpensive and EZ crafts, here are a few ideas on how you can do it. 
If  you can hold  a  paintbrush in your hand, and use a  cookie cutter, you can stencil some cute patterns on your towels, dishcloths and even shirts. And  if you can cross-stitch, you can make simple pillows  and  patterns to spruce up your house. Just  click on the video below to see how I do it. 

Saturday, December 5, 2020

Christmas Quilt for VLOGMAS Day V


 Maybe I should call this a Thanksgiving Quilt because I'm like a kid. I couldn't wait for Christmas to gift this to my sister. I could barely wait to tell her I was making it for her. And, if you take a  peek down in the right-hand corner you can see a cross-stitched Christmas stocking that I gifted to my girls. I have the worst time keeping secrets or holding back on gifts. I just love to see the expressions on peoples' faces when they open their presents - and right now, I think we could all use a little more early Christmas joy. Anyway, I had  to get a little help from my friends on picking out the pattern to use. So THANKS  to everyone who voted on my poll post. This turned out better because of  all the input I received from everyone. I'm a  novice quilter and as you can see, this is a super simple quilt but I'm hoping it will brighten up a spot in my sister's house over the holidays. 

And, if you would like to see my quilting process, check out my YouTube video here on how  I  made this  quilt for my sister. And, while you're over there,  check out some of my other Christmas  projects on my VLOGMAS list

If you've been quilting, please share some of your projects with me in the  comment section below. 

https://youtu.be/lu06g3Kbj3Q

Thursday, September 17, 2020

HALLOWEEN SPIRIT 2020


So, I don't know if you're like me, but I LOVE Halloween. I guess you could say I begin my Halloween Countdown as soon as Labor Day comes on the scene. If I'm really honest, I'm thinking about Halloween as soon as the Easter candy has been eaten. I think up themes for my decorations and  begin working on them early in the year. And this year my Halloween them is a Life-Size Fairy Garden. I've been working on Fairies for months.

Here's one I made months ago. Check out my other post down below. 


Then I started on DRAGONS


I sketched one (and I'm no artist) 


And then I started making my own. (If you’re curious about that, see my post below)


Then I needed some Dragon Eggs. So, I made a few of those.

 (If your curious about that, see my post below: DIY Dragons and Dragon Eggs).

Of course, I wasn't finished there. I needed a castle.

So I started working on that.


And it took a little while.

But I kept working on it.


And working...

Until, ...


But, I still wasn't finished.

I had to make some hanging dragons for the yard.


(If you want to see how I made this little guy, check out my blog post below - with the free pattern opportunity: How to Sew a Dragon)

And, now I'm just getting going...

Keep watching my blog and YouTube for more details of my Halloween Spirit 2020, because I can  promise you, I'm going to have some surprises in store  for our neighborhood kids. 


Saturday, September 12, 2020

DIY Halloween Dragons - Free Pattern and All


So this year my Halloween theme is a Fairy Garden and I've been working on getting some decorations ready and starting to get them out in the yard. This is my dragon and the first one that I've ever sewed.

I looked on-line but couldn't find one that I liked. I really love dragon wings so that's what I was looking for - some large dragon wings. So, I decided to make it myself. I took a  look at  some  of the  dragons on pinterest and then I sketched out my pattern pieces.


After I drew the pieces, I cut them out of butcher paper but you could use old grocery bags if you have some sitting around the house.

Then I laid the pieces out on the material I had waiting for the  project (which I really love) and starting cutting away.


After I had the  pieces all cut out, I laid them out to see how they looked. 


My sister thought it looked like a giant turkey :( 

Anyway, then I used some duct tape to adhere some pipe cleaners to the inside of the wings to give them some ability to be posed into different positions.


Then I started sewing away.... until I had my dragon all assembled. I also took the belly piece and ribbed it by sewing lines across the belly. I stuffed every other belly slot with cotton balls and then I stuffed the body and wings with batting. Perhaps I overstuffed the wings - but that's  the way I like them. Last of all I sewed some beads onto the head, to make some beautiful jewel-toned eyes.


And then my dragon was ready to soar off into the wild blue yonder.

(If you'd like to make one of these, just let me know and  I'll email you the pattern pieces - or maybe you can pull them off this post).

And, if you do make a dragon, please share a photo with me. I'd love to see what you do for Halloween.


Wednesday, October 10, 2018

Quilting and Homemade Stuffed Animals

Those of you who know me, know I love to make, bake and create. I just can't seem to help it. "Sew" when I saw this little elephant fabric, I thought, "I'd love to make a little stuffed elephant for a friend's baby shower." Of course, I'd never made a stuffed animal before but again I thought, "How hard can it be?" 

Lucky for me, I was thinking in 2D not 3D. If I'd had to make four legs, that would have thrown my making into another dimension entirely...thus, 3D not 2D.

But, if you're like me and have never made a stuffed animal (without a pattern) and you're curious how I did it, just keep reading.

First, I was inspired by this fabric, which I used to make the backside of a baby blanket for my friend's shower.

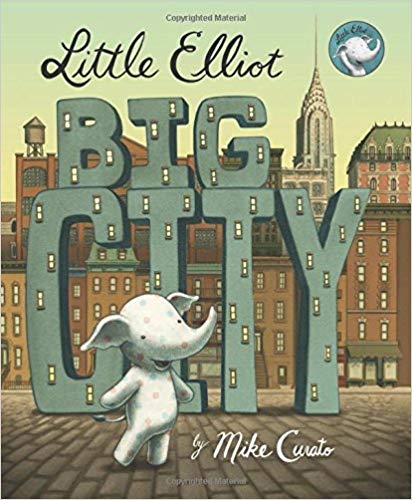
But like everything I do, inspiration comes from many sources. Do you see the yellow and gray polka dot ear on the front side of the baby blanket? Well, immediately I thought an all gray elephant just wouldn't do. Imagine that. But I was also inspired by Mike Curato's Little Elliot - Big City books.

 I just heard Mike Curato give a presentation in L.A. at the SCBWI Summer Conference. I thought, "I want my little elephant to be all polka dotted--like little Eliott." So I went in search of some more fabric - this time polka dotted. And I figured I only needed about one-fourth a yard for a stuffed animal. 

Then I thought, "I really like the shape of the little gray elephant above." So I drew the shape on a piece of paper (and I'm not an illustrator or an artist) so I drew it lightly, in case I made mistakes (which is super silly because it was paper and I was using a pencil--duh, I could have erased a mistake-but whatever, that's what I did). 

When I got that done, I drew the shape right on the fabric.


Cut it out and laid the front sides together and sewed around the edges. I left a little section open so I could stuff it (I made a mistake here--I left the trunk open to stuff, I should have left a foot open to stuff so it wouldn't be noticed as much--but that's the way I did it.)

After I had him stuffed, I sewed a couple of yellow ears on (because I had some leftover yellow fabric from when I made my Candy Corn Cushions for my benches out in my yard). Then I took some leftover material and braided a tail and sewed those on. But I still needed an eye. I didn't want to sew something on that the baby might pull off and eat so I embroidered a little eyelash around one of the polka dots (on both sides). And Voila...or, as I would say,  Wah-lah!


I had a fun little gift for the baby shower (a baby blanket and a stuffed elephant). 

Let me know if you have made a stuffed animal for a child. I'd love to visit your blog to check it out.
 

Thursday, September 6, 2018

HALLOWEEN CANDY CORN CUSHIONS - a DIY Project

HAPPY FALL Y'ALL!

AND FALL MEANS DECORATING FOR THE SEASONS


It's no secret, I love to decorate for every season, holiday and/or event and I wanted to share my latest homemade "make" with you. My latest sewing adventure was to make some new cushion covers for our benches out in the front yard. I had a vision in my head of candy corn and "sew" I went to work to create my vision. And this is what I came up with: an assortment of Halloween Candy Corn Cushion covers and pillows. 
But on top of  loving to decorate, I also love to save money. So I went to Joann Fabric and Craft Store during the Labor Day Sale and bought some orange and white striped fabric and some yellow fabric. I simply had to piece the fabrics together to make my little candy corn pillow. I sewed the fabric with the right sides together (which just means the sides you want showing have to be laid face-to-face).

Then to make this square into a pillow, I cut it into a triangle and sewed it up the sides. I stuffed the triangle with fluffy batting material and then hand-stitched the edge of one corner.


After I had the pillow put together, I went to work on the cushion covers. I needed to fit the material right to the foam cushions because I didn't have a pattern. It was easy to do. All I did was simply drape the fabric over the cushion to get the proper measurements for cutting the fabric. I left an extra inch around the edges (as my seam allowance). You really only need a quarter inch for a seam allowance, but I always prefer to have a little extra (just in case). I used my pressure foot on my sewing machine as the guide to keep the lines straight as I sewed. And it was really easy.


I also wanted to be able to use the cushion covers for more than one month so on the backside I used a solid orange color, which I think is more versatile. That way, I can simply switch out the pillows and use this solid orange colored side all the way through the Thanksgiving holiday. All I have to do is have an assortment of pillowcases for every season and/or holiday...So, I'd better get back to my sewing!


Anyway, my decorating has only just begun ;D But I wanted to wish you all a Happy Fall!

And if you are making any homemade decorations for the upcoming holidays, please let me know about them so I can visit your blog and/or website. I love to get inspiration from other crafty people.