Reading the Bible in 1 Year

The Nation of Israel - Reading the Bible in 1 Year

Showing posts with label #diydecorating. Show all posts

Friday, January 29, 2021

SISTERS


We wanted to see if we could find something fun to do during lockdown. 

Something we hadn't done for decades... If you're interested, click the link below and check out what we've been doing.

Monday, January 11, 2021

DIY Valentine's Day Decorations to spread a little LOVE around

If you're interested in spreading a little love around your house, with inexpensive and EZ crafts, here are a few ideas on how you can do it. 
If  you can hold  a  paintbrush in your hand, and use a  cookie cutter, you can stencil some cute patterns on your towels, dishcloths and even shirts. And  if you can cross-stitch, you can make simple pillows  and  patterns to spruce up your house. Just  click on the video below to see how I do it. 

Wednesday, December 23, 2020

Thursday, December 5, 2019

I'm Dreaming of a . . . Pink Christmas

Some people dream  of snow...not me, I prefer a warm, cozy Christmas. And what could be better than spending the cold weather inside, crafting?

This is an old craft I've done before...but believe me, I'm working on new ones but I thought I'd share this oldie but still a goodie one with you.

This is an easy tree to make. Don't feel restrained to go small; you can make it as big as you want.

All you need is a little tulle, which you can pick up at any fabric store. And, if pink isn't your color, you can go green with a green tree...

Or purple, if you prefer.

Here's how to do it. Lay out your fabric 

Then cut it into strips
Use a dowel and a heavy piece of wood to hold the tree and simply start stacking your strips...
It's as simple as that - then add a star

And you could be finished there. Or pull out your handy-dandy 
glue gun

And then add whatever embellishments you like...I like sparkly rhinestones or fake gemstones

And voila - you'll have a pink or green or even purple Christmas! But no matter what color you prefer,  I hope it's a  healthy, happy and fun-filled Holiday!


Monday, October 14, 2019

Jack Skellington inspired Halloween Project


Have you ever wanted to decorate for the holidays? Well, I always want to do something spectacular but somehow time always seems to get away from me and I have to settle for whatever I can do at the last minute.

Like this year, I wanted to have a Jack Skellington inspired ghoul in my yard by October 1st for all the neighborhood kids to enjoy... but, like I said, time slipped away too fast and by the middle of October I was suddenly aware that the month would be over in a flash. So I  recruited my sons and husband to help me out. And with their help, my Jack  was up and "grinning" at the neighborhood in no time. Well...maybe I should say grimacing over the neighborhood ;D

Anyway, here are a few photos of the process.

The guys started with a sketch of what they were going to do. Then they went to work building the "bones" of the figure out of 2 X 4's.

Once they had the basic structure put together, I went to work painting.

After all the wood was painted a dark gray, Jacob put the head on the top (which was over 15 feet in the air) and then I started dressing him in a thin sheet of black (weed barrier) cloth. The reason I used this was because water will run through the fabric without weighing the character down. This is an important piece of the project in Portland, Oregon. But before I got all his clothes on, Jacob had to light him up.


Jacob put one large red light bulb inside Jack's skull and hid the wire and the bulb (with a little work).


Then Jacob had to help me get his shirt on because, like I said, my Jack is super tallllllll. But even  after all that he still wasn't finished.


Next, I had to make his hands and get those attached. I wanted his fingers really loooooong and creepy...like spider legs. So with the help of duct tape (that miracle material) I think I did it. The only problem is that the guys think his fingers are too long (what do you think?)
I also strung together a few skulls for Jack to carry back to his lair and then I laid out some bones in the yard around Jack's feet.

All-in-all, this was a very fun family project to kick the holiday season into gear. 

Now to finish my witch....Mwah-ha-ha! But, before I go, I just want to wish all the ghouls and goblins out there a....

HAPPY HALLOWEEN!

Thursday, October 18, 2018

Making, Baking and Creating

I love to bake and when one of my kids' birthdays rolls around, I'm all about baking,  making and creating. It's not to say that I'm great at it but I love to do it. So, whenever there's a birthday, you can find me in the kitchen trying to make something sweet for one of my kids, my husband, or a friend ;D

I think baking is easy. All I do is run to the cupboard--like Old Mother Hubbard--but instead of bones, I pull out cake pans and I don't always know what I'm going to make in the beginning but once I get going, something pops in my head.

It's easy to do. All I do is stack layers and cut and shape or simply decorate until I have what I want.

And, I have a BIG family so this fall I made more than a few cakes.

Here's how I did it.

I started with a couple layers of cake (this one was two pineapple upside down cakes that I stacked  together) because my son loves Pineapple... then I covered them with fondant.


And started to decorate.

I was only thinking of pineapple...so this is where I began. But then I had  to add a little bit more.

But Luke's birthday is in October and this didn't seem very Halloweenie . . . and I was thinking of scary eyes...so on the backside I added a couple of Oreo eyes

But that still didn't seem like enough...so I baked a couple more small little cakes...just in case
And I stacked those together to make pumpkins. Then I frosted them with some orange cream cheese frosting.

And to top it off, I used a PayDay Candy Bar as the stem. I guess I shouldn't have added the fondant leave because my husband said that made the cake look like an orange apple. Oh well, I never said I was  great.

And then we sang and ate and ate...oh, but first,  Luke had to blow out his candles.

I think this photo makes him look like he's breathing fire... and that  inspires  me  to make a  dragon cake...next time, I think.

Anyway,  I'd  love to hear about the cakes  you make,  bake  or create. 


Friday, October 12, 2018

GHOST GIRL - How to Make One "Appear"


I’m still working on my Halloween decorations. I'm trying to create a Spooktacular Shoctober.
I have my Ghost Girl haunting the front lawn.  But this wasn't enough so I had to do a little bit more.


She’s made out of chicken wire to make the shape of her dress. Then we draped cheesecloth over the frame. I’m still working on her. I’m thinking of making arms and a head from chicken wire and draping more cheesecloth over the frame to create the illusion of a woman in white floating through the yard.

Any other Halloween lovers out there? What do you think? Any ideas on what else I could do to make the Ghost Girl “appear” ?


Sunday, October 7, 2018

Wishing y'all a Spooktacular Fall

Halloween is lurking just like a ghost. . .around the corner. And with so many negative spirits haunting our recent past, I was thinking... (yep, I know that's a surprise) we should do something festive and fun to celebrate the coming holiday.

This is how I've been spending my energy lately...preparing our family's new "Dead and Breakfast"...for any stray ghouls who want to stop by unexpectedly.

And I just had to make a Day of the Dead pumpkin. It was super simple. I painted a regular pumpkin from the garden. Of course, I spent a little extra time trying to pick just the right one.

Then I covered the shell with black paint, which was super simple to do. But you could use the pumpkin in its original shade, or opt for a green or white gourd.
The problem with white gourds for me is that I always envision ghostly images instead...

And I paint those little gourds into characters... hey, did I mention I'm a writer? Characters are always popping into my head and inspiring me...but I digress.


And that was just the beginning. We decided to build our own family graveyard...in the front yard.


And it turned out pretty realistic looking. But then we added our fun sign...
Which I painted on an old piece of wood my husband shaped for me with his jigsaw.

And we  hung it out over the graves. 


But that wasn't enough. We also made a scarecrow.

And a ghostly figure out of chicken wire, which we painted with glow-in-the-dark spray paint.


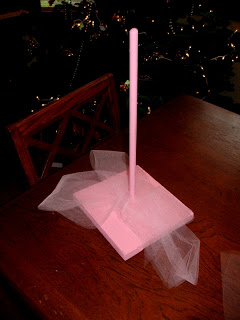
And hung little scarecrows on the fence, in my little flowerpots. Then I wanted witch brooms to hang more lights. But when I found out how much they cost, I thought, I can make some instead. So, I ran to the local feed store and bought a bale of straw and stopped at a lumber store to buy some dowels. The straw was $11.99 at Side Saddle Tack and the dowels were about $3.00 a piece at Mr. Plywood. So for about $30.00, I got more than enough materials to make 6 brooms. The brooms were really easy to make. I laid out some strapping tape on the bale and placed the straw on the top of the tape and simply rolled  the dowel around the tape. I used a bit of twine and voila! I had my brooms. 


The hardest part of making the brooms was keeping my little Freya (my German Shepherd) busy by throwing her ball for her.

Then we lined the brooms up the walkway and wrapped them in lights.


And at night, they are seriously Spooktacular!
Don't they look like they're on fire? An unexpected scary little touch.

Plus, I hung a beautiful fall wreath on the front door.


And made some candy corn cushions for my benches out front (you can check out my previous post about how I made those but here's a quick picture)
 Or two...

And they're reversible, so I can use them through Thanksgiving. 

Maybe we're getting carried away, but we  keep adding to our display.
I don't know...what do you think?

Anyway, I'm hoping you have a Spooktacular Fall Y'all!!!