READING THE BIBLE IN 1 YEAR: Deuteronomy 7

Reading the Bible in 1 Year: Deuteronomy 6

Reading the Bible in 1 Year: Deuteronomy 5

Reading the Bible in 1 Year: Deuteronomy 4

Reading the Bible in 1 Year: Deuteronomy Chapter 2

READING THE BIBLE IN 1 YEAR: Deuteronomy 1

Reading the Bible in 1 Year: Numbers 36

READING THE BIBLE IN 1 YEAR: Numbers 35

READING THE BIBLE IN 1 YEAR: Numbers 34

READING THE BIBLE IN 1 YEAR: Numbers 33

READING THE BIBLE IN 1 YEAR: Numbers 32

Reading the Bible in 1 Year: Numbers 30

READING THE BIBLE IN 1 YEAR: Numbers 29

READING THE BIBLE IN 1 YEAR: Numbers 28

READING THE BIBLE IN 1 YEAR: Numbers 27

Reading the Bible in 1 Year: Numbers 26

Reading the Bible this year: Numbers 25

Reading the Bible in 1 Year - learning about the Children of Israel's history

Reading the Bible in 1 Year: Numbers Chapter 22

Reading the Bible in 1 Year: Numbers Chapter 21

Reading the Bible in 1 Year: Numbers Chapter 20 - Moses

Reading the Bible in 1 Year: Numbers Chapter 19

https://rumble.com/embed/v48d79k/?pub=275tqq

Reading the Bible in 1 Year - Join us on our Journey

Reading the Bible in 1 Year: Numbers 17

READING THE BIBLE IN 1 YEAR: Numbers Chapter 16

Reading the Bible in 1 Year: Numbers 15

Reading the Bible in 1 Year: Numbers 14 - See Post Below

Reading the Bible in 1 Year: Numbers 12

Reading the Bible in 1 Year: Numbers 11

Reading the Bible in 1 Year: Numbers Chapter 10

Reading the Bible in 1 Year: Numbers 9 - The Passover

Reading the Bible in 1 Year: Numbers 8

Reading the Bible in 1 Year - Numbers Chapter 7

Reading the Bible in 1 Year: Numbers 6

Reading the Bible in 1 Year: Numbers Chapter 4

People Need to Come Together - Not Fight

Reading the Bible in 1 Year - Numbers Chapter 2

Join Us as we Read Through the Bible this Year

Reading the Bible in 1 Year: Leviticus 27

Reading the Bible in 1 Year: Leviticus Chapter 26

Reading the Bible in 1 Year: Leviticus Chapter 25

Reading the Bible in 1 Year: Leviticus 24 with a NT Devotional

Reading the Bible in 1 Year: Leviticus Chapter 23

Reading the Bible in 1 Year: Leviticus Chapter 22

READING THE BIBLE IN 1 YEAR: Leviticus 21

READING THE BIBLE IN 1 YEAR - Leviticus 20

Reading the Bible in 1 Year: Leviticus 18 and 19

READING THE BIBLE IN 1 YEAR: Leviticus Chapters 16 and 17

Reading the Bible in 1 Year: Leviticus Chapter 15

Reading the Bible in 1 Year: Leviticus Chapter 14

Merry Christmas - We're Reading Leviticus 13

Reading the Bible in 1 Year: Leviticus 11 and 12

READING THE BIBLE IN 1 YEAR: Leviticus Chps 9 &10

Reading the Bible in 1 Year: Leviticus Chapters 7 & 8

READING THE BIBLE IN 1 YEAR: Leviticus Chapters 5 and 6

Reading the Bible in 1 Year: #Exodus Chapters 2, 3, and 4

Reading the Bible in 1 Year Leviticus Chapter 1

The Nation of Israel - Reading the Bible in 1 Year

Monday, December 30, 2013

HAPPY 2014!


Wishing you all a healthy and happy 2014!

Sunday, December 29, 2013

Finished

Better late than never...right?

It turned out really pretty and I think it's kind of funny how well it blends with our fir flooring being that it is made out of pine.

It must be the color of the stain. It's a honey color. Obviously one of our favorites.

I told Kara it looked like a coffin so she climbed inside to see if she would fit. And she said, "Maybe one day."

Then Lars just had to glue on the little tag he had burnt into the wood for her. So that many years from now she can look back and remember that her Dad made this chest for her during the Christmas of 2013.

Now, we just need to deliver the present.


Wednesday, December 25, 2013

Christmas and the Elves have been Busy


Lars has been working on a hope chest, (blanket box), or Cedar Chest - made from Pine ;D for our daughter for Christmas...

He put it off until December 20th - which didn't leave him a lot of time to figure it all out because he's never made one before and he didn't want to "buy" a pattern or try to find one on-line. He said, "I'll wing it." But with only a couple of days to buy the wood, figure out what he was making and make it...I was a little worried.

Here's how the project went.

First he just built a box (which I thought looked a bit like a coffin). And then he had to make the top.

He glued together a couple long pieces of word for the top and used little pieces of wood for support. And he glued some more . . .

 And some more
 Here he's using a silicon basting brush (yep something from the kitchen) he says the glue won't stick to silicon . . .
 And some more. . .
 He glued and glued and . . .
 GLUED!
And then glued some more.

Then he worked on making the back  . . .

Monday, December 23, 2013

Wishing You All a Howling Happy Holiday!

Merry Christmas - hope you all have a howling holiday!

Sunday, December 22, 2013

White Chocolate Peppermint Popcorn...YUMMMMMMM

It's so easy to make a special homemade gift to give your friends and neighbors without spending a lot of time or money. Here's how I did it this year.

First I popped a huge portion of popcorn.

Then I melted some white chocolate.

You have to check it - to make sure you don't burn it.

I melt it slowly...checking on it as I go.
When it's smooth and glossy - you're ready.

I smashed about 8 candy canes -- but first I put them in a baggie to keep the mess contained - but you could use any peppermint candy - I just had these around the house during the holidays.

I stirred most of the crumbled peppermint into the white chocolate but I reserved some to sprinkle over the top of the popcorn to make it look prettier.

And I left a few big chunks of peppermint.

Then I poured the white chocolate and peppermint mixture over the top of the popcorn - in a stainless steel bowl - and I stirred it around to make sure it was well-covered.

Then I took some metal tins and lined them with aluminum foil and poured the popcorn inside.

That way they have the tin after they finish the popcorn for another little gift :D

But, if you don't have tins, you could use baggies - after the popcorn has cooled and the white chocolate has set - and wrap a pretty ribbon on the top and WAH-LAH a wonderful edible gift you can give and feel proud that it will be enjoyed. And, if you want to add a movie into the mix... no problem!

It can be a wonderful evening you can give a family...now, if only FROZEN was out in dvd. :D


Making an Ornament Wreath

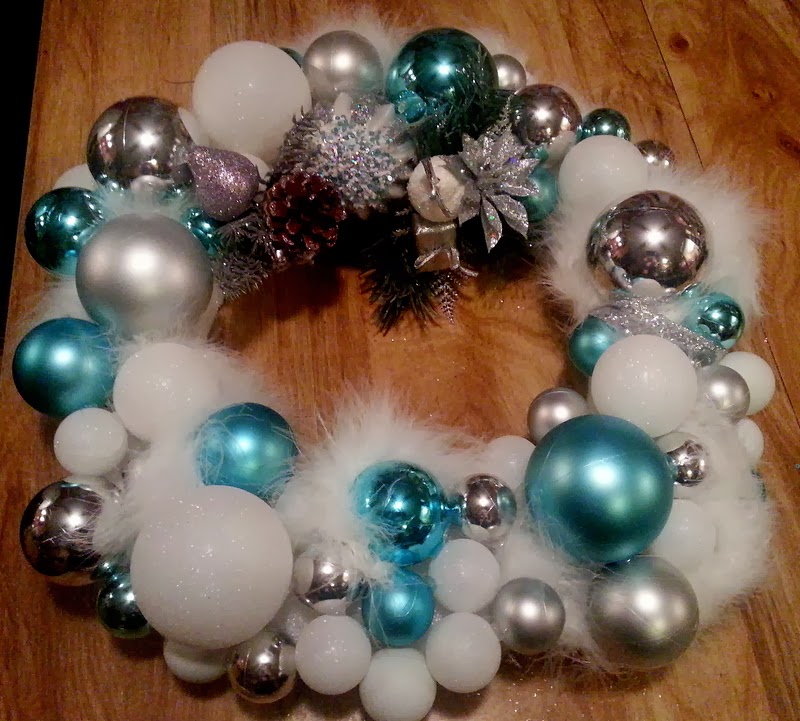
It's really simple to make a Christmas Ornament Wreath. And, if you buy the supplies now while everything is 70% to 90% off (at the crafting stores) it will be super inexpensive too.

Here's how I did it.

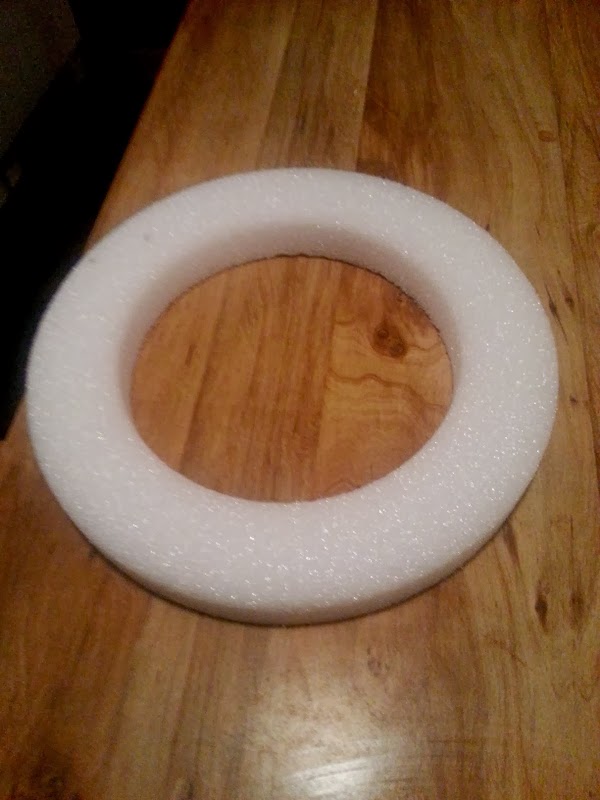
First I bought a foam core base - but you could use cardboard or an old wreath frame - whatever you have.

Then I laid out my supplies

Next, I dumped all my ornaments into a bowl so I could see what I was working with and grab and go easily.
Then I simply started sticking the balls into the foam.
I shoved them into the foam and then glued them in place for extra sticking power.
Sometimes I'd put one in and then not like the look and pull it out and reposition it. It's all up to you.
Then I weaved a craft feather boa in and out of the ornaments. And I had to wiggle it around to get it just how I wanted it.

But then there were still some gaping holes. So, I used some little flower package ornaments (see above) and stuck them in where there were holes.

But then I still wasn't happy - so I grabbed out some ping-pong balls and started gluing them in place.
But then I didn't like the edges, so I used some ribbon that I glued in place to cover any foam that was peeking out, but you could use any silk flowers that match the color scheme you're going for. Or, you could use some greenery from your Christmas tree branches or even your yard (yep, I've been known to do that - lots of times). I just look around the house or yard and find something that works. A pinecone is beautiful spray painted gold or silver.


Then I hung it on the door (and I tried a couple different doors to see which one looked best).

I thought the blue ornaments would look nice on the blue door. But...

I worried about the feathers getting wet outside so I tried the inside door.
And that's where it is. I put my ribbon wreath outside. I think it will hold up better outside...but we will see.

I might have to find/make another wreath...you just never know.


Friday, December 20, 2013

Holiday Home Tour

I love the holidays and I love to decorate... And, if you're like me, and you want to see some homes that have decked their halls, go here and visit Jen on the Edge who is hosting a wonderful holiday tradition of people opening up their houses to share the way they celebrate and decorate.

Here's how my house looks for this year's holiday.

First there's the halloween wreath that I re-created into the wreath on my front door, which now I've switched out for this one...

I've moved my old ribbon wreath outside - to the front door.


And there's the wine bottle with the Christmas lights.

And my little tulle tree on top of the curio cabinet.

And my vintage ornaments inside the curio cabinet.


And my Christmas cards strung on a ribbon and hung up high where we can all see them.

And then there is the pointsettia.

And all the advent calendars 

with some of the presents still hanging on them.

And the Christmas stockings

 And my Christmas tree.
And then there's the outside of the house.